So I stopped on this project for a while. I was really intimidated by the next steps of having to put covers on, the leather/fabric work. The text block was relatively easy, but the next steps could make or break the aesthetics. In the end.... Well, I made a book. It doesn't look particularly attractive, but it's a lesson in trying. And a lesson in what not to do.
Headbands:
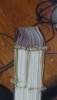
I followed a tutorial, but I also kind of messed up and put glue on the core material, which made the string not want to wrap and tie correctly. It's not pretty, but it does its job.
 Spine Cloth:
The video said to use some kind of cloth to cover the spine. I think they used a type of linen cotton. I was poor at the time and didn't have that laying around, so I cut up a pillow case and glued that to the edge.
 Cover Boards:
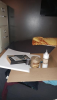
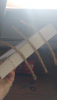
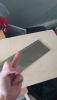
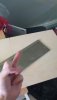
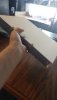
When I went ot the craft store originally, the only boards they really had were birch plywood boards. If I could go back in time, and if I could go to a different craft store, I would have done this step over entirely. The boards I had were VERY thin, and they splintered at every step. I had a hand saw, but it was old and jagged. You can see my frustration with trying to saw into it, lmao. Eventually, I got an electric saw thingy and made my roommate cut them to size. In later steps, it would become a major issue because the boards were so thin that the staples would poke out of the other side. We will get to that mess later, though.
 Putting the Boards On
So this was also a challenge. As I mentioned, the boards were very thin. But they were also very hard to work with, and I swear they were resistant to nails, screws, hammering. God, it was awful. To put the boards on, I had to make three holes in order to thread the spine cords through. I did not have a drill, so I thought I'd try to screw some screws in to make the holes. But they weren't going through. So then I took a nail and hammered the holes in, which was a journey because they just wouldn't go through. But eventually, I nailed the holes, and then I was able to put in the screw to widen the nail holes. And THEN I had an awl that flared out at the handle, so THEN I tried pushing and twisting the awl into the holes to widen them further so they were big enough to fit the cords through. It was a difficult few hours.... I should have just bought a drill.But eventually, I got the boards put on, and it looked really nice. I frayed and glued the cords to the inside cover and let it to sit in my makeshift bookpress of heavy marble slabs I took over the end tables and a bucket of cat litter.
 The "Leather"
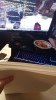
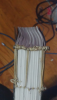
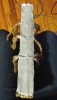
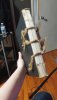
So by this step, I was pretty poor. I was budgeting for an upcoming trip and new I could not afford leather, leatherworking tools, dye for the leather, etc. As well, I was very intimidated by the thought of working with it and messing it up. If I ever try this again, I will use actual leather. But I decided to buy this upholstery fabric that was sort of like a faux leather. But I also knew that my boards were really, really thin and I knew that if I tried stapling, it would just go through the other side of the board and poke out of the fabric that's supposed to be the front cover. So I bought that upholstery fabric, and like a cottonesque padding. I glued the cotton padding laying to the cover boards, and then I glued the upholstery fabric over that. In order to make the spine cords stand out, I took jute cords and tied around the whole thing and left it over night so that I could make that side more pronounced.
 The... Staple & Edges Saga
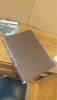
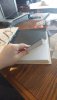
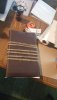
Alright. By this point, I was really mostly just fed up with this whole endeavor. I just wanted it to be over. I wanted it to be done, and it led to some pretty... severe mistakes. I think that cotton layer was both a good decision, but also a bad one. But in order to keep the staples from poking through, I had to roll the leather/padding over itself and staple. It led to a really, really, really thick inside cover that looks pretty weird. And because the inner edges were/are so puffy, I couldn't evenly and flatly connect the end sheets (the black pages). If I tried glueing them, it would look weird and uneven, with parts of the board showing. So I took some black drawing paper and I glued that down. The paper was thinner than I thought, and I should have evenly painted glue. Instead, I just drizzled glue on the board and it shows. This is really just the start of the downhill spiral lmao.
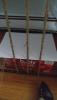
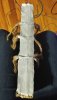
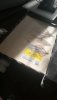
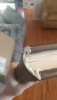
As well, with the stapling, I still had a lot of length at the spine area. The problem is that the cotton won't glue to itself. It just absorbs the glue and becomes hard. So I couldn't fold it over and glue it for a nice end piece, and I couldn't staple it to itself. So........ I just sort of cut it off. I cut the extra fabric and lord that made it look like ass. In this particular picture, I had dabbed some of the glue on it so that at lest the cotton would fray and pull out. The glue is white when wet, but dries clear. So it looks a little different now. I can't uncut that fabric though, so maybe I'll think of a solution in the future. I might try a decorative cord on the bottom and attach it to cover the exposed weird cotton. idk.
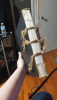
 The Finished Product
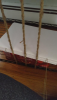
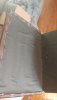
I took some metal edge protectors and hammered them into place. It was difficult because of how puffy the cotton and faux leather was. But I hammered those on and called it a day. I had some ideas for decorating the cover, but by this point, I was annoyed with the whole thing and did not want to risk messing it up further. From a distance it looks pretty decent. Up close..... Ehhh............ I think if I ever did this project over, I've learned some valuable things. Learned not to use super thin plywood boards, and I think I'm going to blame a lot of my problems on those. If they weren't so thin, I wouldn't have felt the need for that cottony felt padding, then I wouldn't have had weird puffy interior edges, or a gaping cotton mess. You live and you learn. I am not exactly proud of this adventure, but I wanted to update you on the ups, downs, and weirdness that came from the journey.